


Chimney Flashing Leaks and What Causes Them with Solutions That Work
- thechimneyguysclea
- Sep 22
- 5 min read
When water drips near your fireplace or brown stains appear on the ceiling around your chimney, the problem often isn’t your shingles—it’s your chimney flashing.
Chimney flashing is the thin sheet metal (usually aluminum, galvanized steel, or copper) installed where your roof meets your chimney. It may look minor, but it’s one of the most critical barriers protecting your home from water intrusion. When flashing fails, water damage isn’t far behind.
At Chimney Masters Cleaning and Repair, we see chimney flashing leaks every week across Philadelphia and surrounding counties. In this post, we’ll explain:
What chimney flashing is and why it matters
The most common causes of leaks
Signs your flashing is failing
Proven solutions that actually work
How professional repair protects your home long-term
Why Chimney Flashing Matters
Your chimney and roofline are constantly exposed to rain, snow, wind, and temperature extremes. The joint between these two structures is one of the most vulnerable areas of your home.
Flashing is designed to:
Direct water away from the chimney-roof intersection
Prevent leaks into your attic, walls, and ceilings
Protect structural components like roof decking and framing
Without functional flashing, even small rain showers can cause major problems over time:
Roof leaks that damage insulation, drywall, and ceilings
Wood rot in rafters and roof decking
Mold and mildew growth inside attic spaces
Expensive repairs when minor leaks escalate into major projects
What Causes Chimney Flashing Leaks?
There isn’t just one cause. Flashing can fail for a variety of reasons—some due to poor installation, others from natural wear and tear. Here are the most common issues we encounter:
1. Poor Installation
One of the biggest culprits is flashing that was never installed correctly. Mistakes include:
Skipping counter-flashing and relying only on step flashing.
Using tar or caulk as the main barrier.
Cutting corners with improperly layered metal.
When shortcuts are taken, leaks are inevitable.
2. Low-Quality Materials
Thin sheet metal or rust-prone flashing corrodes quickly, especially in Philadelphia’s wet climate. Once rust takes hold, water finds its way in.
3. Weather Damage
Freeze-thaw cycles are brutal on flashing. As water expands in tiny cracks, it pushes flashing and mortar apart. UV rays from the sun also break down sealants over time.
4. Roof Movement
All houses shift slightly as they settle or as roofing materials expand and contract with temperature changes. This movement can pull flashing apart from chimney walls.
5. Lack of Maintenance
Flashing isn’t “set it and forget it.” Without regular inspections, small cracks and gaps go unnoticed until they cause significant leaks.
6. Animal or Debris Damage
Birds, squirrels, and raccoons sometimes pry at flashing edges. Leaves, branches, or moss can also trap moisture, accelerating corrosion.
Signs Your Chimney Flashing Is Leaking
Not all flashing leaks are obvious right away. Watch for these warning signs:
Brown water stains on ceilings or walls near the chimney
Musty odors in the attic or around the fireplace
Rusted, cracked, or visibly peeling flashing
Water dripping inside the firebox during rain
Loose or warped shingles around the chimney base
If you spot any of these, it’s time for an inspection.
DIY vs. Professional Chimney Flashing Repair
Some homeowners consider patching themselves with tar or caulk. While tempting, DIY flashing repair rarely works for long.
DIY Pros:
Lower upfront cost
Quick fix for very small gaps
DIY Cons:
Dangerous to work on steep roofs without gear
Caulk and tar degrade quickly in harsh weather
Doesn’t address hidden leaks or structural issues
No warranty—if it fails, you’re back to square one
Professional Repair Benefits:
Comprehensive inspections to catch hidden leaks
Custom-fabricated step and counter flashing for a perfect fit
Durable metals like aluminum or copper
Proper installation layered to shed water naturally
Warranty protection and peace of mind
Bottom line: DIY is a temporary band-aid; professional repair is the long-term solution.
Solutions That Actually Work
At Chimney Masters Cleaning and Repair, we follow a proven process to fix flashing leaks and prevent them from returning. Here’s how we do it:
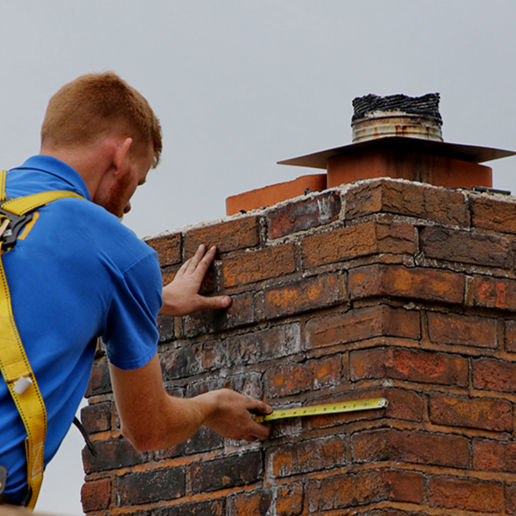
Step 1: Inspection
We start with a full inspection of the roofline, chimney masonry, and attic to identify all signs of water intrusion.
Step 2: Removal of Old Flashing
Any rusted, cracked, or improperly installed flashing is carefully removed. We also clear away old tar, caulk, or debris.
Step 3: Masonry Preparation
If mortar joints are cracked, we grind them out and repoint them to create a strong base for counter-flashing.
Step 4: Custom Flashing Installation
We fabricate new flashing from copper, aluminum, or galvanized steel, cut to fit your chimney’s exact dimensions. Step flashing is woven into shingles, while counter-flashing is embedded into mortar joints.
Step 5: Sealing and Waterproofing
UV-resistant sealants reinforce seams, and we offer optional chimney waterproofing to protect masonry against future water absorption.
Step 6: Final Quality Check
Every job ends with a complete inspection to ensure watertight protection. We also provide before-and-after photos for your peace of mind.
Preventing Future Flashing Leaks
Once your flashing is repaired, a little maintenance goes a long way. Here’s how homeowners can keep their chimney leak-free:
Schedule annual inspections to spot small issues early.
Check the attic after storms for damp insulation or staining.
Avoid DIY tar patches, which often make leaks worse.
Clean gutters and rooflines to prevent debris buildup.
Consider chimney waterproofing to extend the life of both masonry and flashing.
Why Philadelphia Homes Need Extra Care
Our region’s weather creates unique challenges for chimney systems:
Freeze-thaw cycles expand small cracks into large leaks.
Historic homes often have outdated or failing flashing.
Heavy rainfall and snow accelerate corrosion and mortar damage.
Tree debris and moss trap moisture against flashing, speeding deterioration.
That’s why it’s critical to work with local experts who understand Philadelphia’s climate and building styles.
The Cost of Chimney Flashing Repair
Costs vary depending on the extent of damage and materials used. In Philadelphia, here’s what homeowners can expect:
Minor resealing: Affordable, usually a few hundred dollars.
Partial flashing replacement: Moderate cost, depending on roof height and access.
Full flashing replacement: Higher cost but ensures decades of protection.
Factors affecting price:
Material choice (copper is premium, aluminum more budget-friendly)
Roof pitch and accessibility
Masonry repairs needed
Extent of hidden water damage discovered during inspection
While professional repair has a higher upfront cost, it saves thousands in avoided water damage down the road.
Final Thoughts
Chimney flashing leaks are one of the most common—and most damaging—roofing issues homeowners face. Left unchecked, they lead to rot, mold, and expensive structural repairs.
The good news? With proper inspection, expert repair, and preventative maintenance, chimney flashing leaks can be fixed and prevented for years to come.
At Chimney Masters Cleaning and Repair, we provide certified technicians, durable materials, and warrantied service. Whether you’re dealing with active leaks or want peace of mind before the next storm, we’re here to help.
Don’t wait until water finds its way inside. Call (215)-486-1909 Chimney Masters Cleaning and Repair today to schedule your flashing inspection and repair.


Comments